The first thing I notice on the dream lake trail is how quickly the forest absorbs the parking lot. A few minutes after leaving Bear Lake, the sound changes: boots on stone, water moving under old snow, the occasional breath of someone settling into the altitude. This is a short route, but it is not a casual walk in every season. Crowds, ice, afternoon storms, and elevation can turn a mile into a useful lesson in judgment.
The route is in Rocky Mountain National Park, beginning at Bear Lake Trailhead and climbing roughly 1.1 miles to Dream Lake. The elevation gain is about 425 feet, with the lake sitting near 9,900 feet. Those numbers look modest on paper. They feel different when you arrive from sea level, carry a child, or step onto polished ice in November. I have walked this trail in clear summer mornings, shoulder-season silence, and conditions that made turning around the better choice.
What the route actually feels like
The dream lake trail starts on a broad, heavily used path through lodgepole pine and spruce. Nymph Lake arrives first, usually after a steady climb of less than a mile. The trail is obvious, but the footing is not always simple. Roots, embedded rock, meltwater, and frozen steps create a rhythm that rewards attention rather than speed.
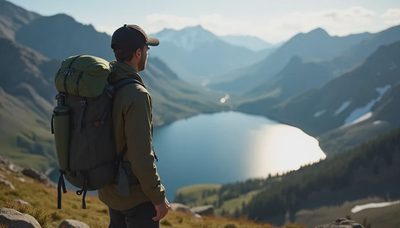
Beyond Nymph Lake, the grade becomes more noticeable in short sections. You cross open rock and gain views toward Hallett Peak and Flattop Mountain as the trees thin. Dream Lake appears gradually rather than dramatically. The shoreline, boulders, and high walls make the destination feel enclosed, almost private, even when other hikers are present.
In dry summer conditions, most experienced hikers will find the dream lake trail straightforward. The problem is usually not route-finding. It is the accumulation of small decisions: whether to pass on a narrow section, whether your traction is adequate, whether a tired companion is still moving safely, and whether a dark cloud deserves more respect than the schedule.

Timing, parking, and the crowd problem
Start early if you want the route to have any quiet in it. The Bear Lake area fills quickly during popular summer weekends, and the park may use timed-entry requirements or shuttle arrangements depending on the season and current operations. Confirm the rules before driving up. A reservation does not guarantee an empty trail; it only makes your arrival possible within the system in place that day.
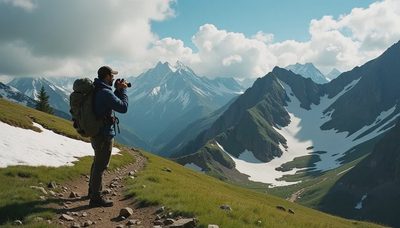
The best morning on the dream lake trail begins before the strongest sun reaches the basin. Light comes through the trees in narrow bands, and the rocks are often less slick before the day warms them. By late morning, the trail can become a two-way negotiation, especially around Nymph Lake and the steeper sections above it. If you are photographing, step fully aside rather than stopping in the walking line. Small courtesies matter on a route this busy.
Allow two to three hours for the out-and-back if you walk steadily, longer if you pause at both lakes or need time to adjust to altitude. The distance is short enough that people regularly underestimate it. Build in time for slow footing, a snack, and a decision made without pressure.
Weather and seasonal hazards
Summer weather in the high country can change faster than the forecast suggests. The dream lake trail is below the most exposed alpine terrain, but lightning is still a serious concern in the wider Bear Lake corridor. If thunder is audible, leave exposed shorelines and move toward lower, sheltered terrain. Do not wait for rain to make the decision obvious.
Snow and ice create a different route. Microspikes are often more useful than heavy boots when the trail is packed hard, particularly in shaded areas near the lakes. Trekking poles help with balance, but they do not replace traction. In winter, the route enters avalanche terrain considerations above and around the broader corridor, even if the final approach to the lake looks familiar. Check current avalanche information and park conditions rather than relying on a summer memory.
Spring can be the least predictable period. Snow bridges weaken, meltwater runs across the path, and the surface may alternate between mud and ice within a few steps. Waterproof footwear helps, but careful foot placement helps more. The dream lake trail does not require technical climbing, yet an ankle injury here still means a slow evacuation through a crowded, uneven corridor.

Water, gear, and what I carry
Treat the trail as a short hike, not a supply line. Carry water from the trailhead; do not assume the lakes are clean drinking sources. A small filter or treatment option is reasonable for an emergency, but it is simpler to bring enough for the outing. On a warm day, I usually carry around two liters, less when temperatures are cool and the turnaround is definite.
My footwear choice changes with the surface. Trail runners are comfortable in dry conditions, while shoes with a firm sole and reliable tread feel better on wet rock. In winter I add microspikes, poles, gloves, and a shell. A small first-aid kit, headlamp, map application with a downloaded route, and an insulating layer belong in the pack even when the forecast looks friendly. The headlamp is not dramatic equipment; it is for the ordinary mistake of starting later than planned.
Leave the lake edges as you found them. Food scraps, soap, and careless shortcuts become someone else's problem, and alpine vegetation recovers slowly. Keep wildlife distance, secure snacks, and stay on established surfaces where the route allows it. The dream lake trail already receives heavy use. The least visible visitor is often the most responsible one.
The mental part of a short hike
Short routes invite poor assumptions. A partner may say the lake is close, a map may show a simple line, and the group may keep moving because turning around feels embarrassing. I have learned to ask the useful question early: what condition would make us stop? Ice without traction, worsening weather, headache that does not improve, or a companion losing coordination are all valid answers.
The dream lake trail is a good place to practice that discipline because the consequences are manageable. Stop before the group is exhausted. Eat before everyone is irritable. Name the turnaround point out loud. If one person wants to leave, treat that as information, not weakness. The lake will still be there on another morning.
There is also value in staying after arrival. Find a stable place away from the narrow path, watch the light move across the water, and let the crowd pass. The destination is not a box to check. It is a pause in the route.
A simple plan for the day
Check park access, weather, and trail conditions the evening before. Arrive with water, layers, traction appropriate to the surface, and a route downloaded to your phone. Start early enough that a slow pace will not create pressure. Move carefully through the rocky sections, especially where meltwater or ice crosses the tread. At Nymph Lake, reassess how everyone is feeling rather than treating it as an automatic halfway point.
If conditions remain stable, continue toward Dream Lake and give yourself a real rest there. If the weather turns, footing deteriorates, or someone is struggling, descend while the group is still moving well. That is not a failed outing. On the dream lake trail, the cleanest success is returning with enough attention left to notice the trees again.
One steady step.



No comments yet — grab the first one.